How to Install Git on Windows
- EN
- JA
Table of Contents
Git is a version control system that helps manage changes to programs, documents, and other files.
This guide explains the steps to install Git for Windows.
#
Download and Run the Installer
Go to the official website and click “Download” in the middle of the page to download the installer.
After downloading, run the installer. You will need administrator privileges to proceed.
#
License Agreement
The license agreement will be displayed.
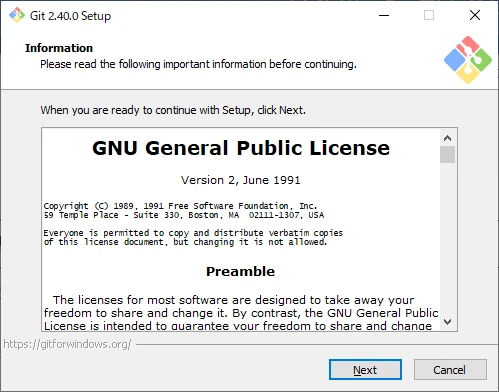
If you agree to the terms, click “Next” to proceed.
#
Select the Installation Destination
Choose the folder where Git will be installed.
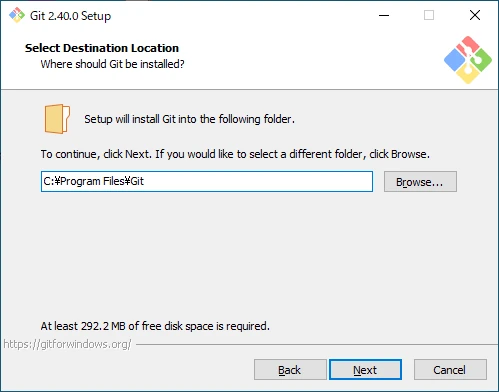
If you don’t have a specific preference, click “Next” to use the default path.
#
Select Components to Install
Choose the components to install.
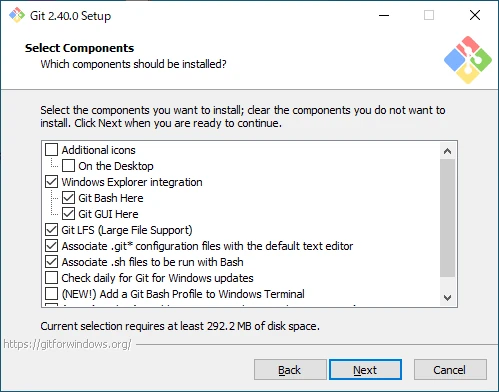
- Additional icons
- On the Desktop
Add a shortcut for Git Bash to the desktop.
- On the Desktop
- Windows Explorer integration
- Git Bash Here
Add Git Bash to the right-click menu. - Git GUI Here
Add Git GUI to the right-click menu.
- Git Bash Here
- Git LFS (Large File Support)
Install Git LFS. - Associate .git* configuration files with the default text editor
Associate files that start with .git with the default text editor. - Associate .sh files to be run with Bash
Associate .sh files with Git Bash. - Check daily for Git for Windows updates
Check for Git for Windows updates daily. - Add a Git Bash Profile to Windows Terminal
Add Git Bash to Windows Terminal. - Scalar (Git add-on to manage large-scale repositories)
Install Scalar.
If you don’t have a specific preference, leave the default options selected and click “Next” to proceed.
#
Start Menu Folder Name
Set the folder name for the Start Menu entry.
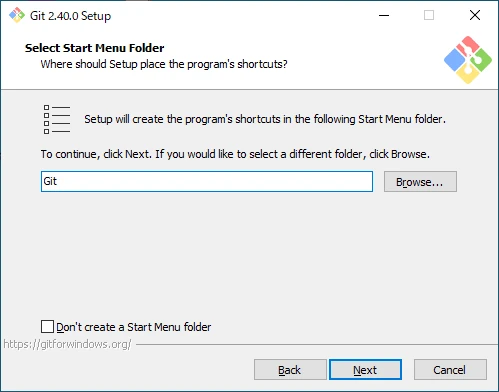
If you do not want to create a Start Menu folder, check “Don’t create a Start Menu folder.”
If you don’t have a preference, click “Next” to proceed.
#
Choose the Default Editor for Git
Select the default editor to use with Git.
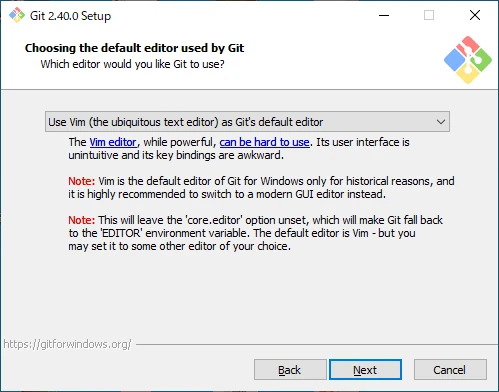
By default, it’s set to Vim. If you don’t have a specific preference, click “Next” to proceed.
#
Set the Name of the Initial Branch
Set the name of the first branch for new repositories.
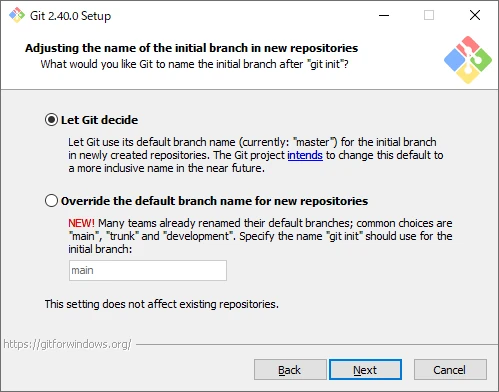
The default is “master,” though GitHub uses “main” as its default.
After setting this, click “Next” to proceed.
#
Configure the Environment Variables
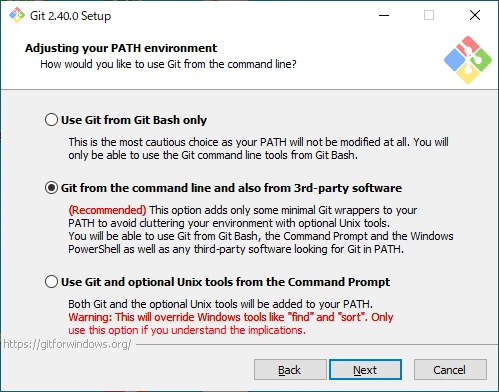
- Use Git from Git Bash only
Do not modify the environment variables. Git and Unix tools will only be available through Git Bash. - Git from the command line and also from 3rd-party software
Add Git to the environment variables. Git can be run from the Command Prompt or PowerShell, but Unix tools will only be available from Git Bash. - Use Git and optional Unix tools from the Command Prompt
Add Git and Unix tools to the environment variables. Git and Unix tools can be run from the Command Prompt or PowerShell.
If you don’t have a specific preference, click “Next” to proceed.
#
Configure SSH
Configure SSH settings.
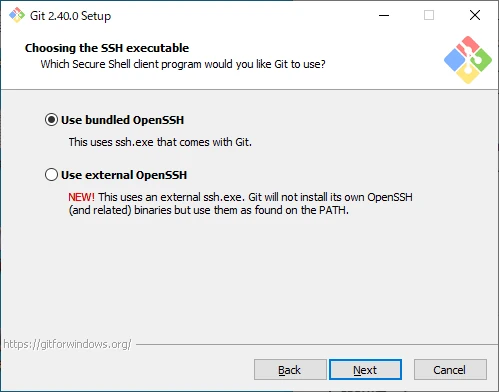
- Use bundled OpenSSH
Use the bundled ssh.exe provided by Git. - Use external OpenSSH
Use an external ssh.exe.
If you don’t have a specific preference, click “Next” to proceed.
#
Configure SSL/TLS
Configure SSL/TLS settings.
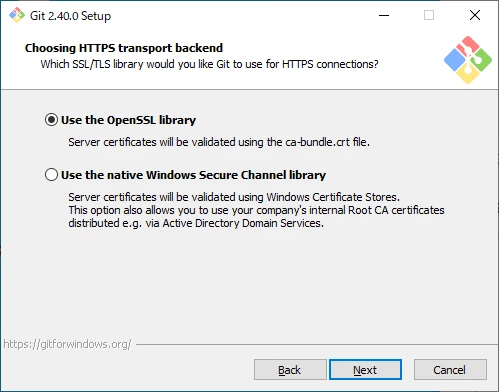
- Use the OpenSSL library
Use the OpenSSL library. Server certificates will be verified using the ca-bundle.crt file. - Use the native Windows Secure Channel library
Use the Windows Secure Channel library. Server certificates will be verified using the Windows certificate store, which can include internal root CA certificates distributed by Active Directory.
If you don’t have a specific preference, click “Next” to proceed.
#
Configure Line Endings
Select the line ending conversion settings.
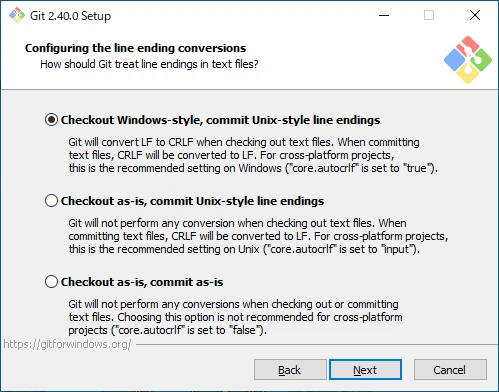
- Checkout Windows-style, commit Unix-style line endings
Convert line endings to CR+LF on checkout and convert to LF on commit. - Checkout as-is, commit Unix-style line endings
Do not modify line endings on checkout but convert to LF on commit. - Checkout as-is, commit as-is
Do not modify line endings on either checkout or commit.
The default is to convert to CR+LF on checkout and LF on commit. Be cautious as this may cause unintended issues.
After selecting, click “Next” to proceed.
#
Choose the Terminal
Select the terminal to use with Git Bash.
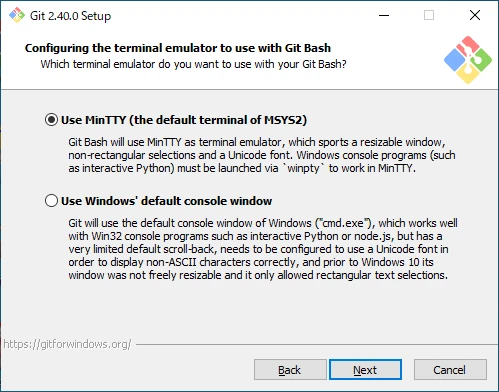
- Use MinTTY (the default terminal of MSYS2)
Use MinTTY, the default terminal of MSYS2. - Use Windows’ default console window
Use the default Windows console window.
If you don’t have a specific preference, click “Next” to proceed.
#
Set the Default Behavior of git pull
Select the default behavior for git pull.
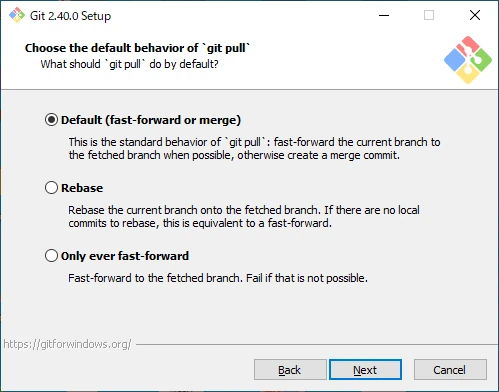
- Default (fast-forward or merge)
Rungit pull --ff. - Rebase
Rungit pull --rebase. - Only ever fast-forward
Rungit pull --ff-only.
If you don’t have a specific preference, click “Next” to proceed.
#
Configure Credential Helper
Configure the credential helper settings.
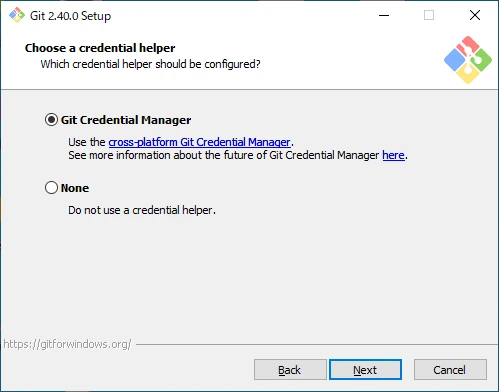
- Git Credential Manager
Use Git Credential Manager. - None
Do not use a credential helper.
If you don’t have a specific preference, click “Next” to proceed.
#
Set Additional Options
Configure additional options.
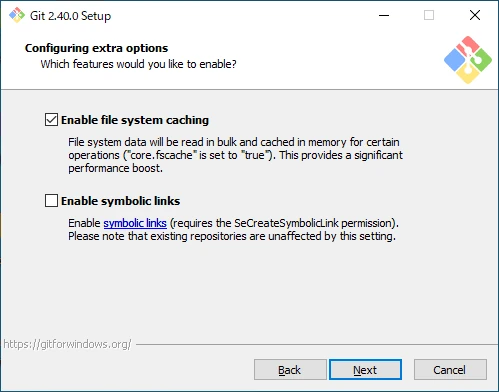
- Enable file system caching
Enable caching to significantly improve performance. - Enable symbolic links
Enable symbolic links.
If you don’t have a specific preference, click “Next” to proceed.
#
Set Experimental Options
Configure experimental options.
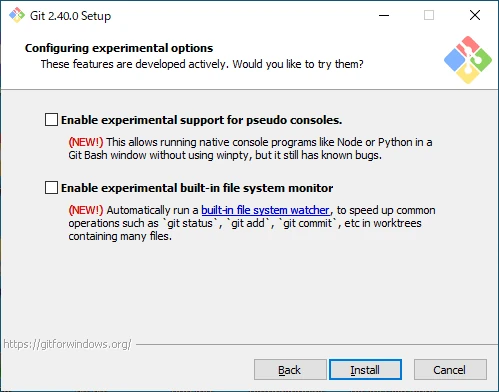
- Enable experimental support for pseudo consoles.
Allows running Python or Node in Git Bash. - Enable experimental built-in file system monitor
Speeds up Git commands when working with many files.
If you don’t have a specific preference, click “Install” to proceed with the installation.
#
Install Git
The installation process will begin. Wait for the installation to complete.
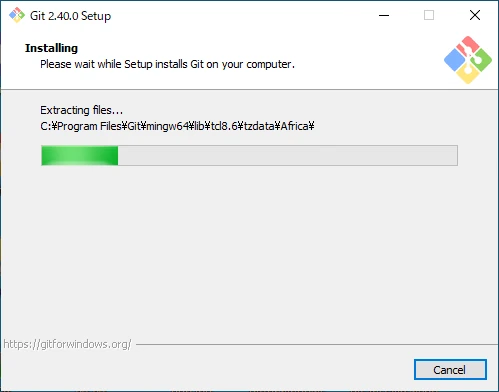
Once you see “Completing The Git Setup Wizard,” the installation is complete. Click “Finish” to close the installer.