Create a Repository on GitHub
- EN
- JA
Table of Contents
Creating a repository on GitHub is a very simple process. Below are the specific steps.
#
Open the Repository Creation Page
Go to GitHub and log in to your account.

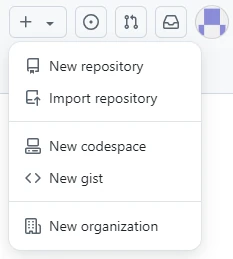
Click the “+” icon in the top-right corner of the homepage, and select “New repository” from the dropdown menu.
#
Enter the Basic Information for the Repository
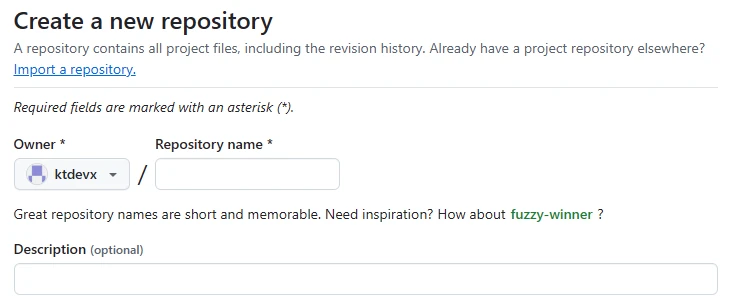
Enter the repository owner, name, and description.

- Owner
Select the account or organization that will own the repository.
You can choose either your personal account or an organization account. - Repository name
Enter the name of the repository. - Description
Enter a description of the repository.
#
Set Repository Visibility
Set the visibility of the repository.

- Public
Make the repository public, allowing anyone to view it. - Private
Make the repository private, so only you and invited members can access it.
#
Add README / .gitignore / LICENSE
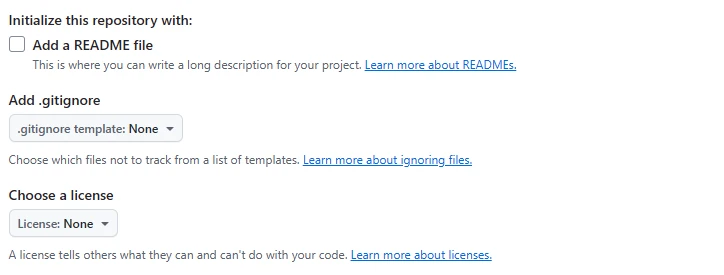
Add essential files like README, .gitignore, or LICENSE to the repository.

- Add a README file
If you check this box, a README.md file will be automatically created in the repository.
The README.md file is where you can describe the overview and usage of the repository. - Add .gitignore
You can select a programming language or framework and add a .gitignore file to exclude unnecessary files or folders from being tracked by Git.
This allows you to configure specific files or directories that won’t be committed to the repository. - Choose a license
You can choose which license to release the repository under.
The repository license determines how others can use the code.
#
Create the Repository
Once all the settings are complete, click the “Create repository” button at the bottom of the page.
This will create the repository, and the repository’s main page will be displayed. From here, you can clone it locally, add files, and manage the repository.